
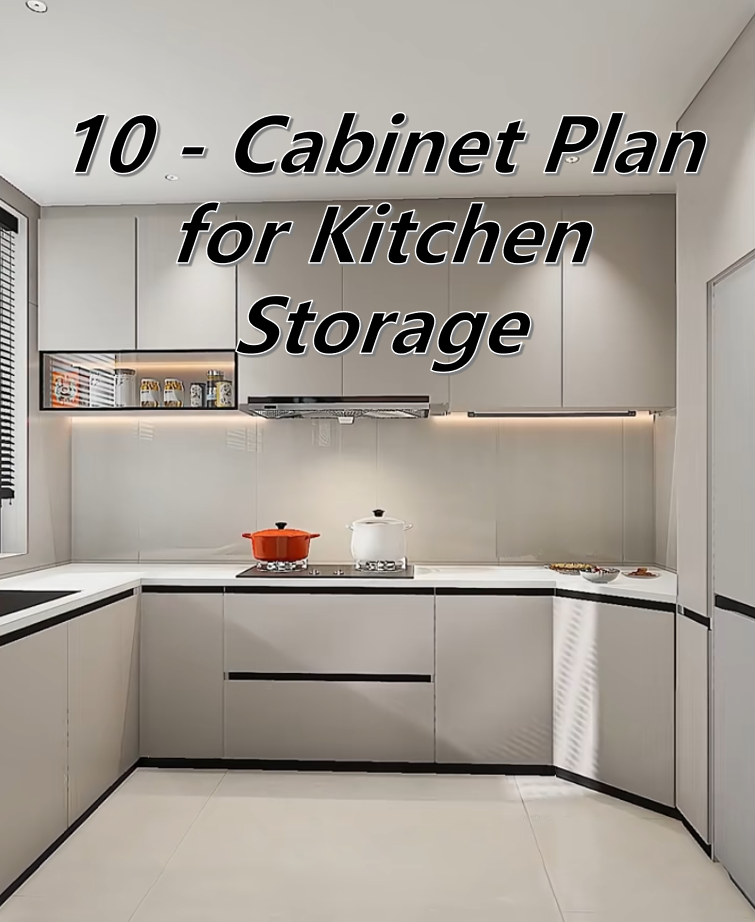
Kitchen storage has always been a tough nut to crack in renovation. Many people think "just build more cabinets", but the result is either wasted space or inconvenient access. In fact, choosing the right 10 core cabinet types can make the kitchen both tidy and functional. Today, we'll share this "golden cabinet" layout, making the most of every inch of space from the refrigerator to the corners.
Ⅰ. Refrigerator Area: Turn "Useless Gaps" into Storage Champions
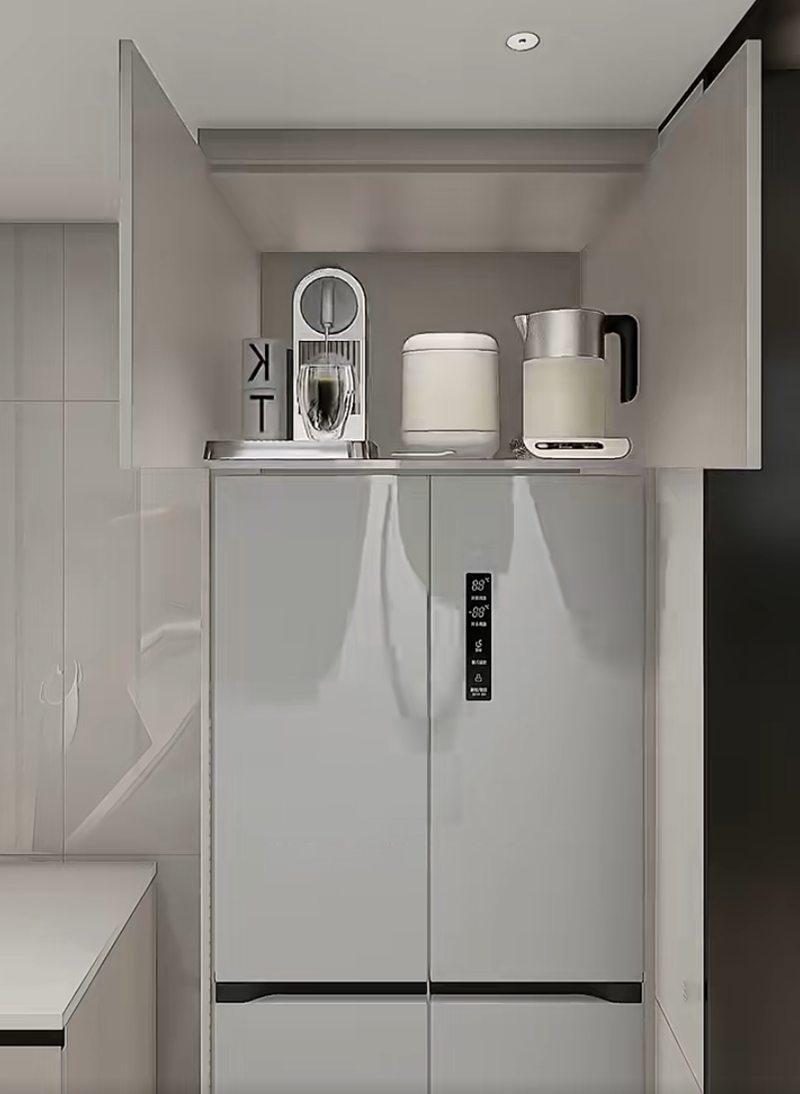
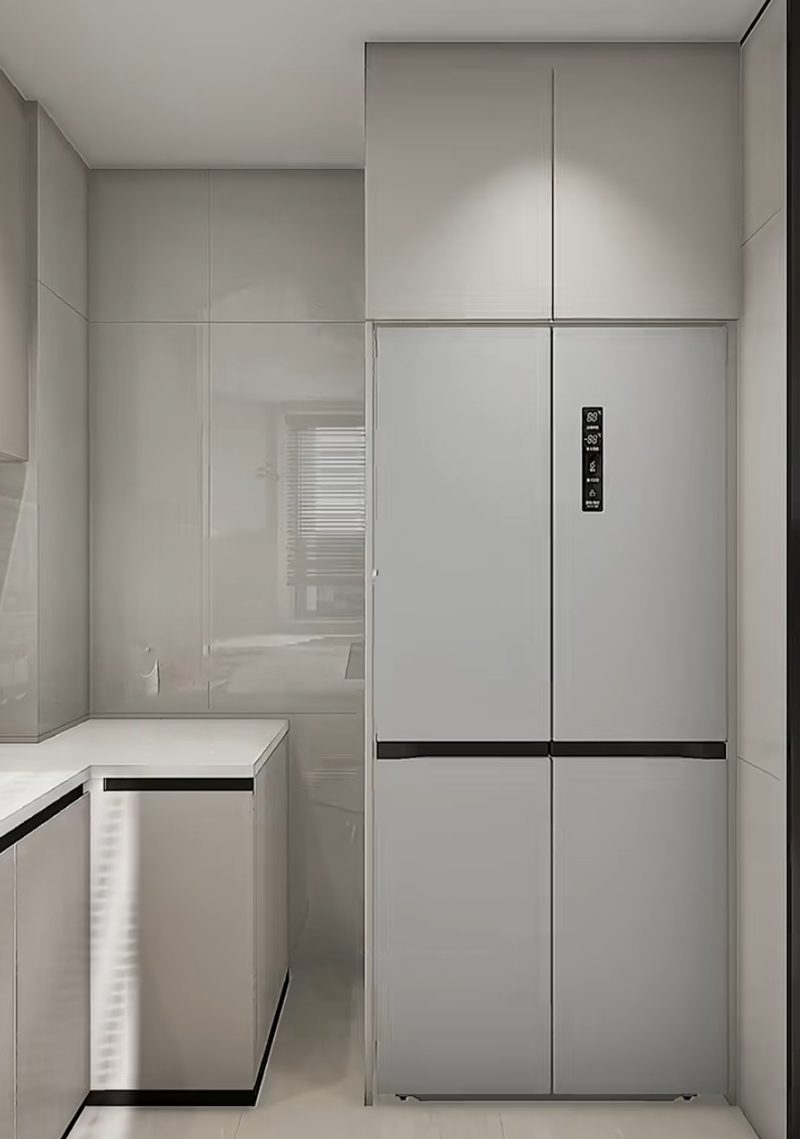
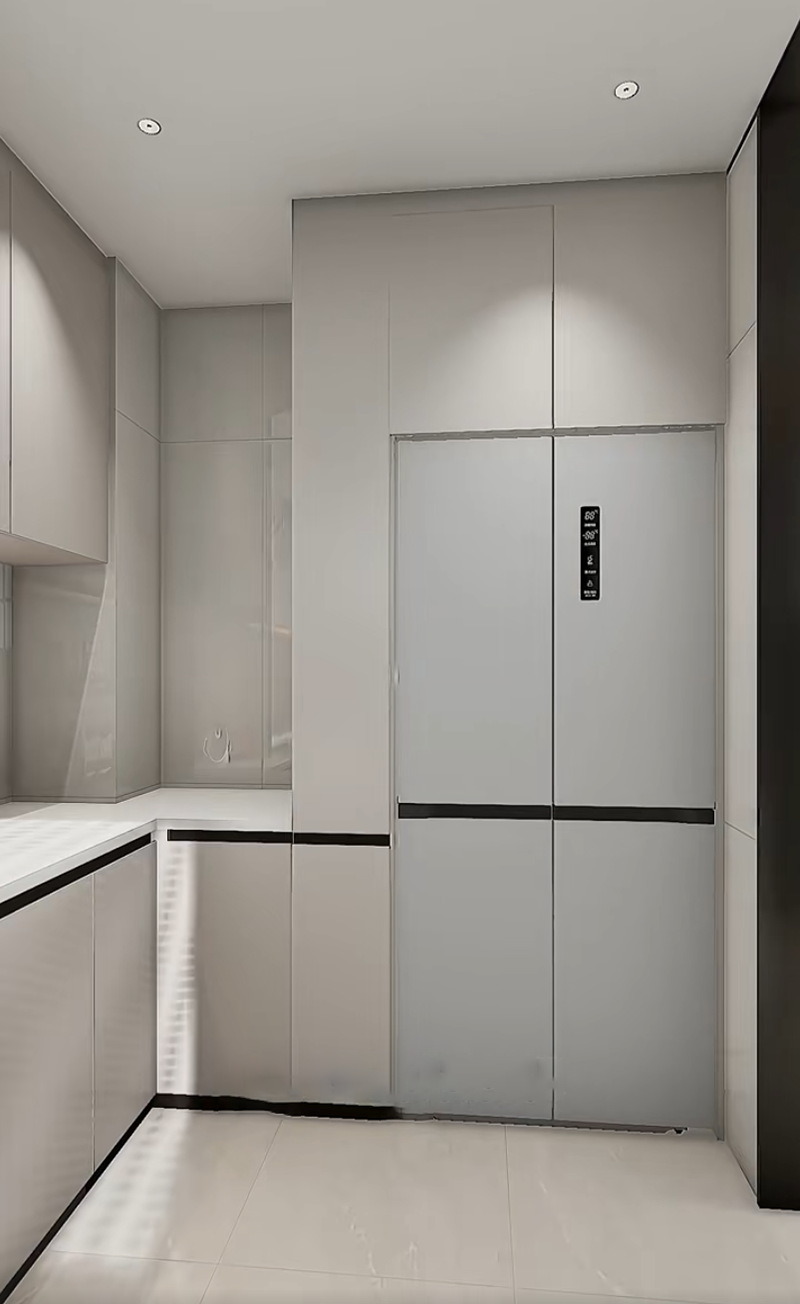
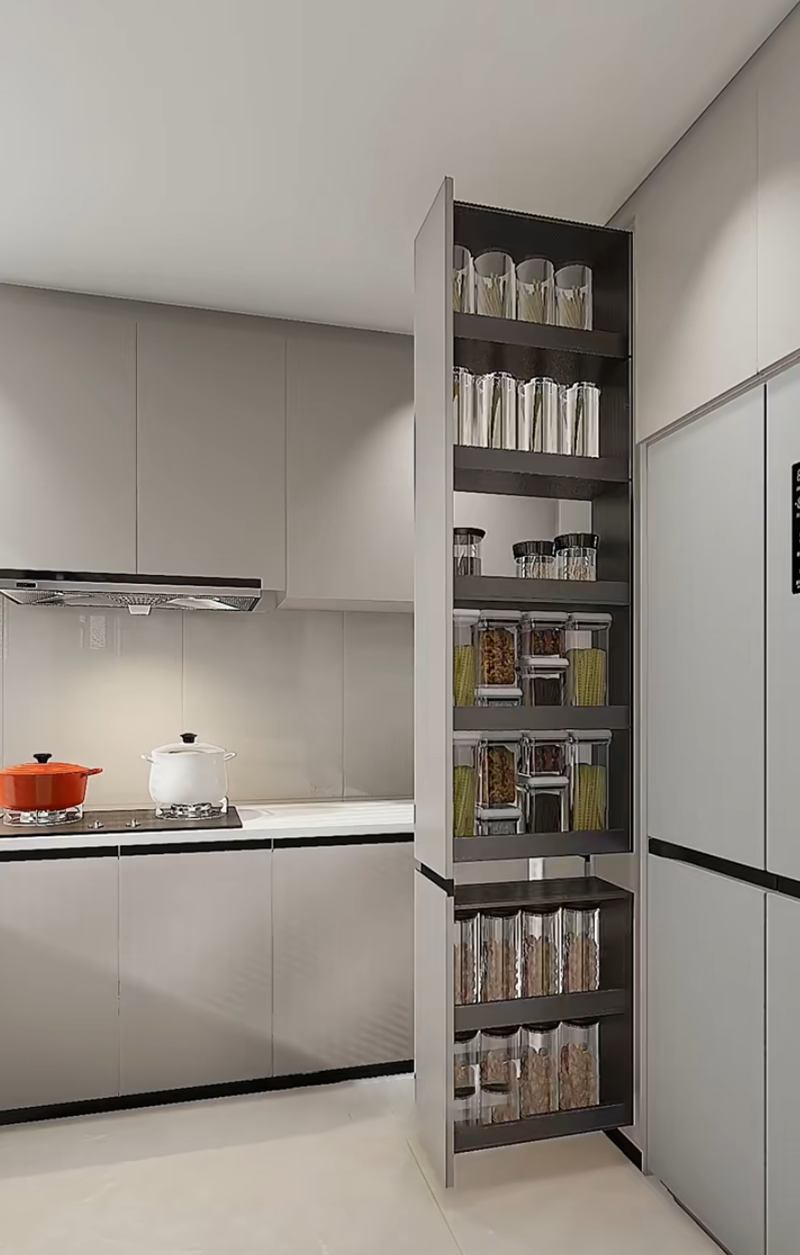
①. Tall Cabinet on the Right Side of the Refrigerator: A "Secret Base" for Snacks and Stockpiles
Ⅰ. Refrigerator Area: Turn "Useless Gaps" into Storage Champions
①. Tall Cabinet on the Right Side of the Refrigerator: A "Secret Base" for Snacks and Stockpiles
Move the refrigerator to the right and build a floor-to-ceiling tall cabinet (30 - 40cm wide) on the side. Use layered partitions on the upper level for snacks and drinks, and large drawers on the lower level for rice, flour, and oil. Choose sliding doors, so there's no need to reserve space for opening doors, and even small kitchens can hold a huge amount of stockpiles. There's no need to crouch down to rummage when taking things.
②. Pull-Out Cabinet on the Side of the Refrigerator: Spices "Within Reach"
②. Pull-Out Cabinet on the Side of the Refrigerator: Spices "Within Reach"
Design a narrow side pull-out cabinet (about 25cm wide) next to the refrigerator. Make multiple partitions inside to hold commonly used spices like soy sauce and vinegar. The depth of the pull-out cabinet is the same as that of the refrigerator, and it's completely invisible when the door is closed. When cooking, you can take spices with a pull, which is 10 times faster than rummaging through cabinets.
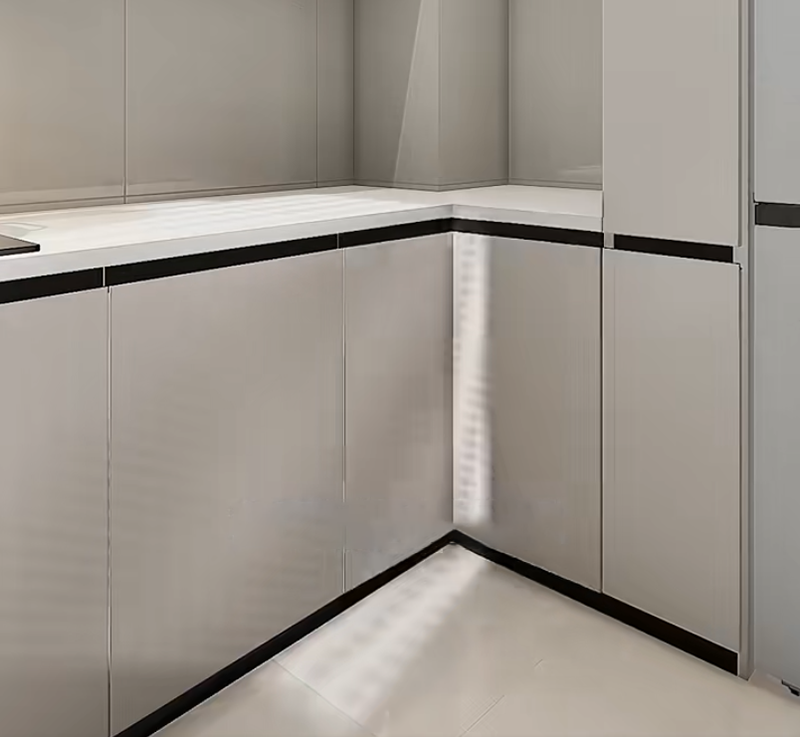
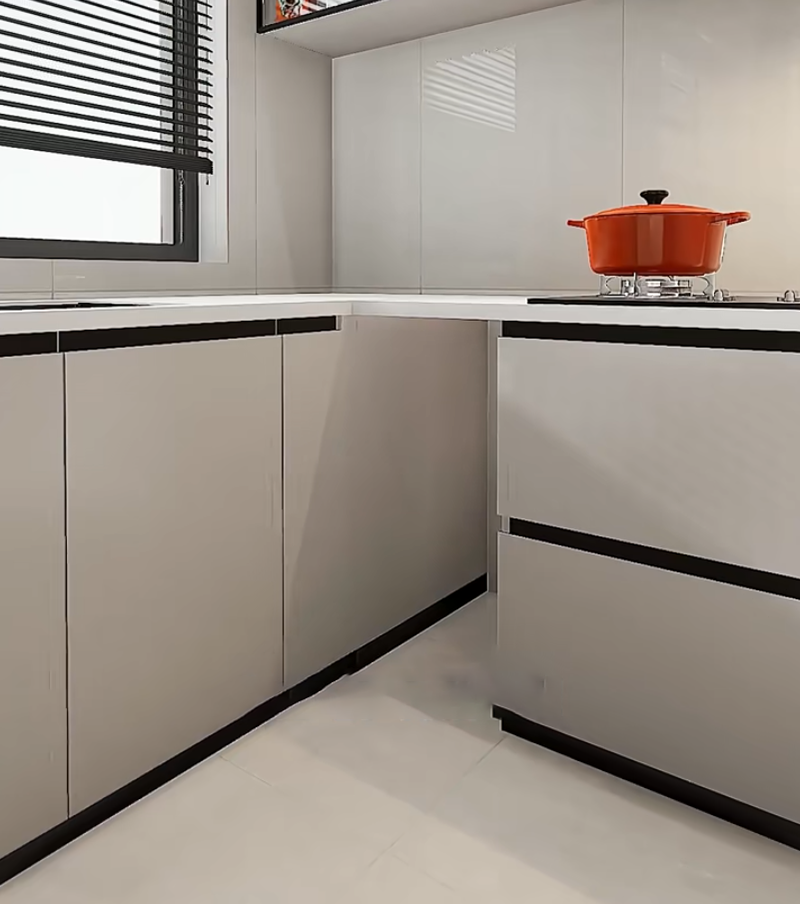
Ⅱ. Corner Area: Don't Let "Dead Corners" Waste Space
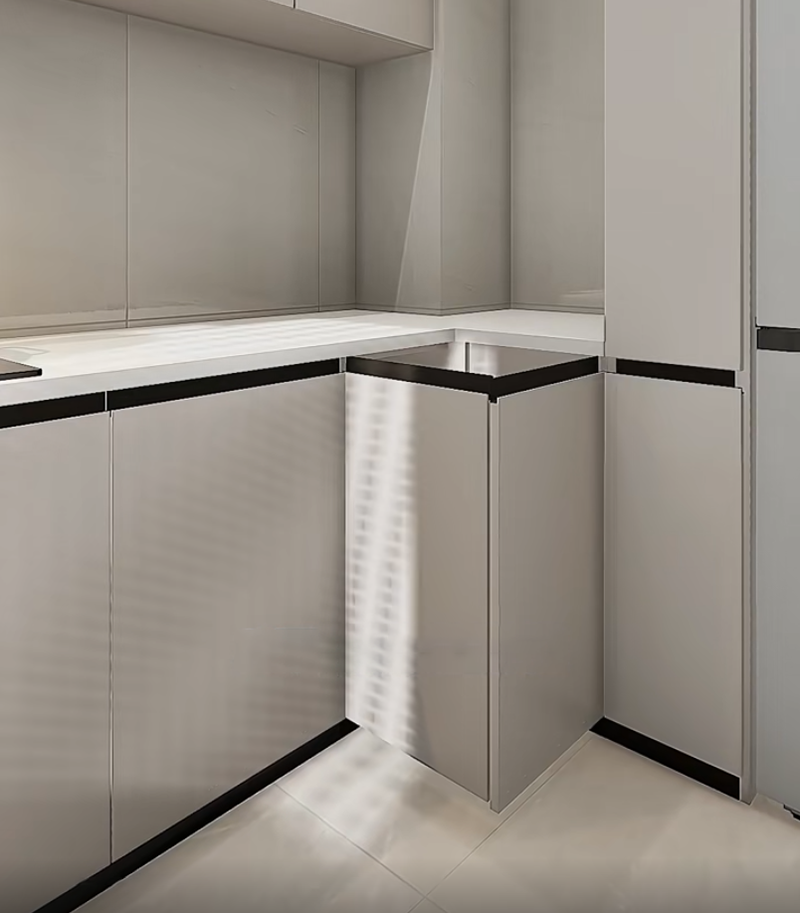
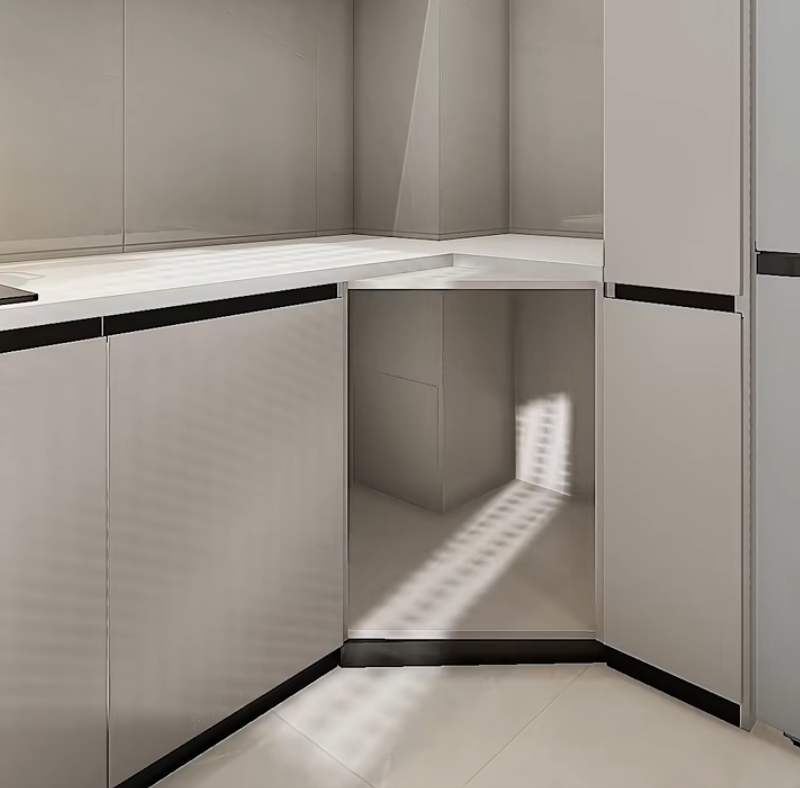
③. Diamond-Shaped Corner Cabinet: Super Easy to Store Large Items
Ⅱ. Corner Area: Don't Let "Dead Corners" Waste Space
③. Diamond-Shaped Corner Cabinet: Super Easy to Store Large Items
Abandon traditional right-angle cabinets and make a diamond-shaped corner cabinet. The cabinet door is beveled, and the internal space is completely exposed when opened, which can easily hold large barrels of oil and rice bags. The countertop can also be extended into a "small bar", which is very convenient for temporarily placing baking pans and pizzas, and can hold 30% more items than ordinary corner cabinets.
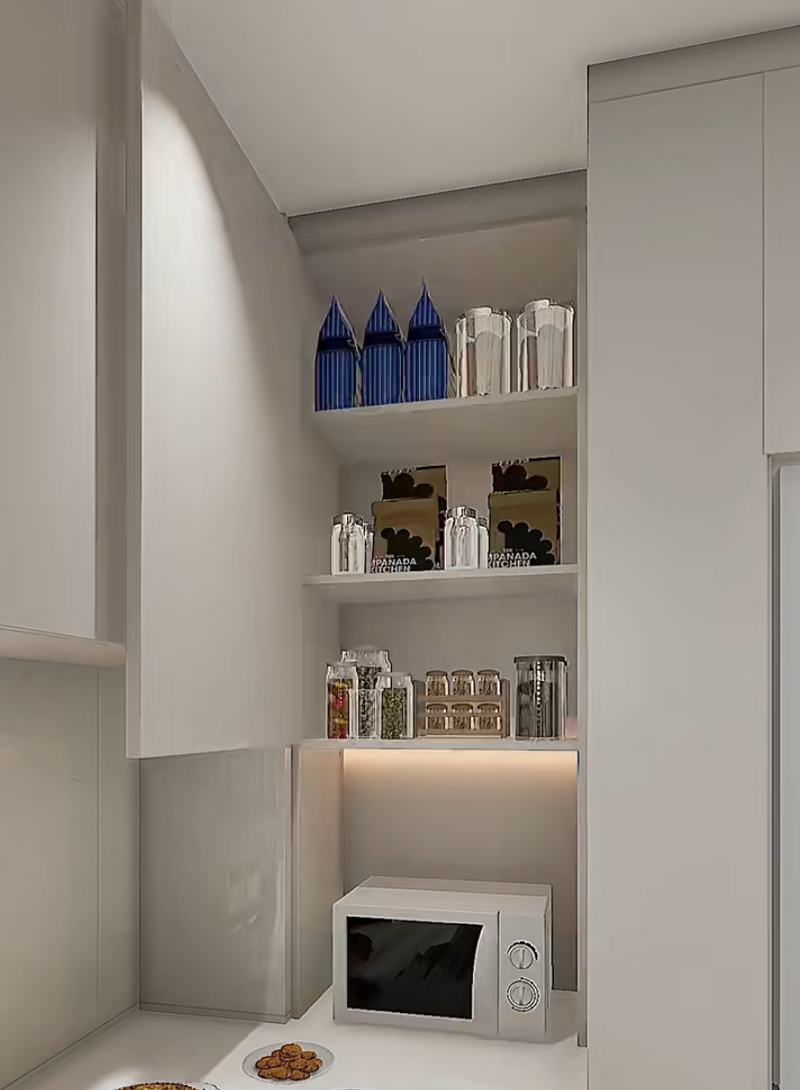
Ⅲ. Hanging Cabinet Area: "Smart Design" for No Head-Bumping and Easy Access
④. Ultra-Thin Top-Mounted Hanging Cabinet: "Hide" Small Appliances
Ⅲ. Hanging Cabinet Area: "Smart Design" for No Head-Bumping and Easy Access
④. Ultra-Thin Top-Mounted Hanging Cabinet: "Hide" Small Appliances
Make an ultra-thin hanging cabinet (15cm thick) on the window or blank wall, and extend it all the way to the top. Place coffee cups and snack boxes on the upper level, and embed microwaves and toasters on the lower level. Reserve sockets inside the cabinet, plug in directly when in use, and close the door when not in use. The countertop is instantly refreshed, and small appliances can also be prevented from accumulating dust.
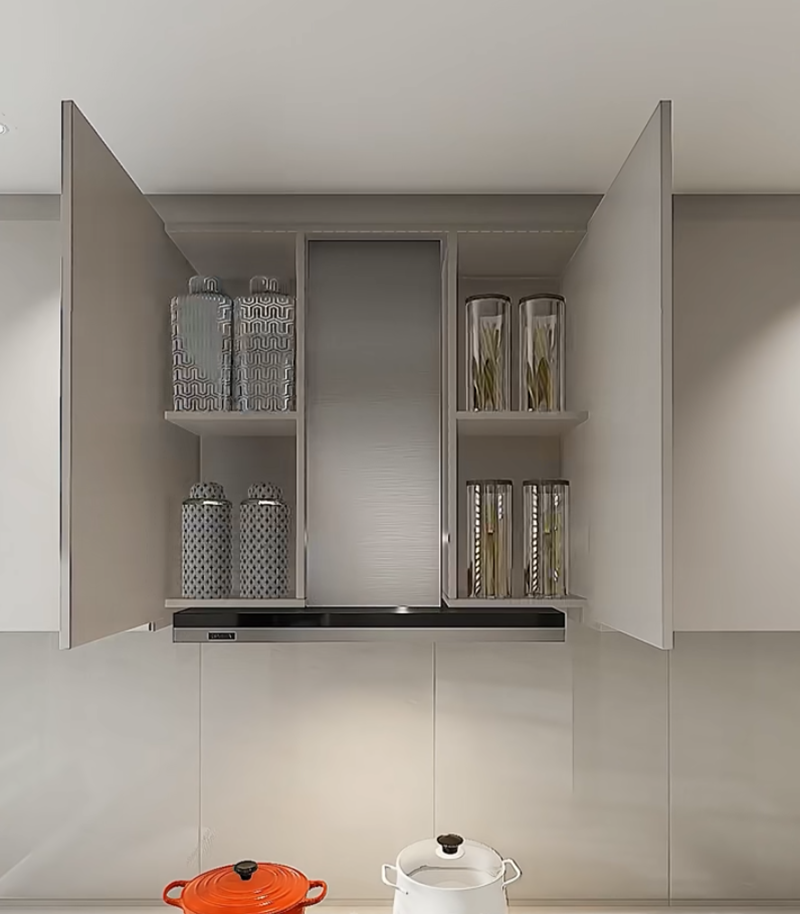
⑤. Lifting Basket Hanging Cabinet: Say Goodbye to "Unreachable"
⑤. Lifting Basket Hanging Cabinet: Say Goodbye to "Unreachable"
Replace traditional hanging cabinets with lifting baskets, with layered mesh baskets inside. Press the handle lightly, and the basket will slowly descend to the chest height. Oils, salts, sauces, vinegars, and cans can be easily taken, and there is no need to stand on tiptoe or move stools anymore, which is especially friendly to short people and the elderly.
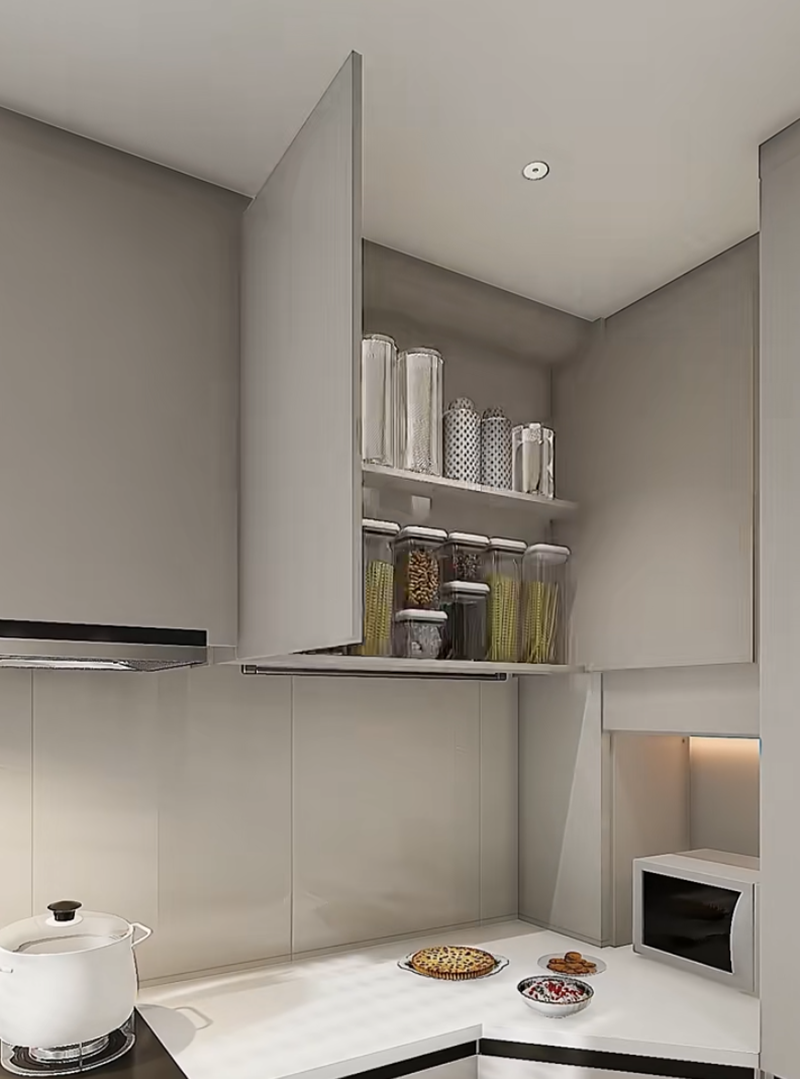
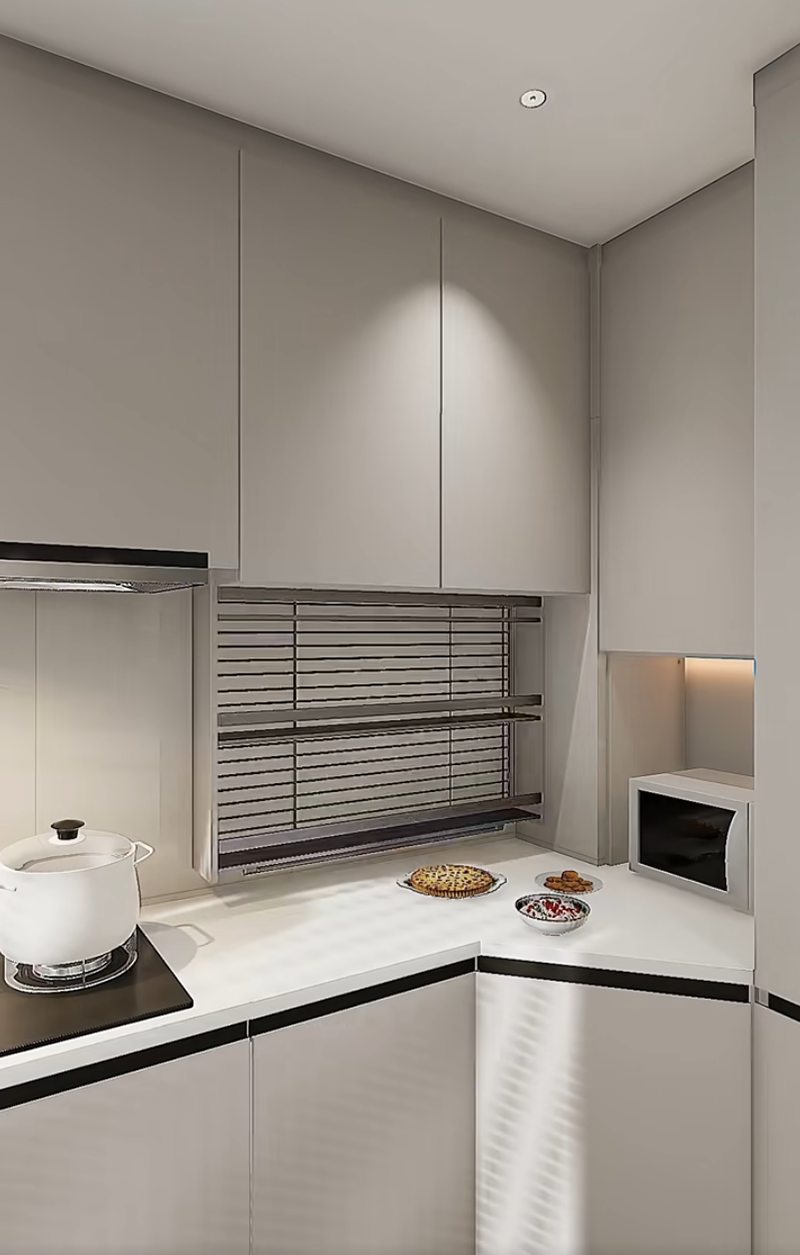
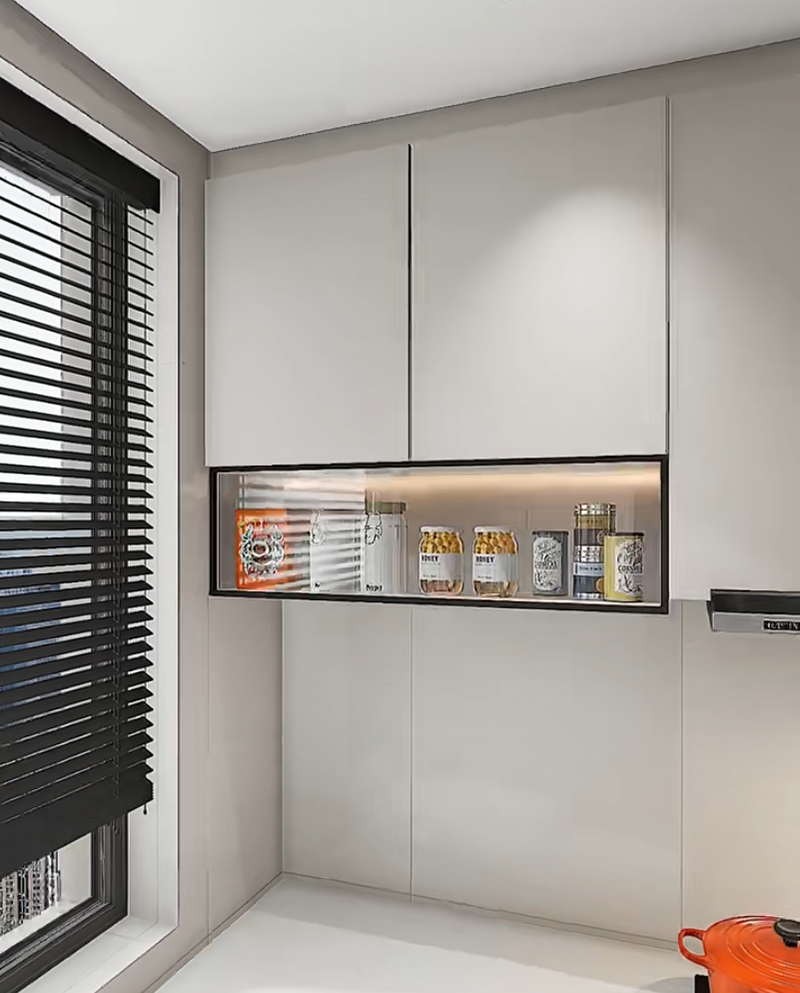
⑥. Symmetrical Grid of Range Hood: Squeeze Every Inch of Space
⑥. Symmetrical Grid of Range Hood: Squeeze Every Inch of Space
Make symmetrical storage grids on both sides of the range hood, without cabinet doors, and directly use open laminates. Put commonly used spice jars on the left and dried fruit sealed jars on the right. You can get them with a twist of your head when cooking, which is more efficient than drawer storage, and it is neatly arranged like "forcing obsessive-compulsive disorder".

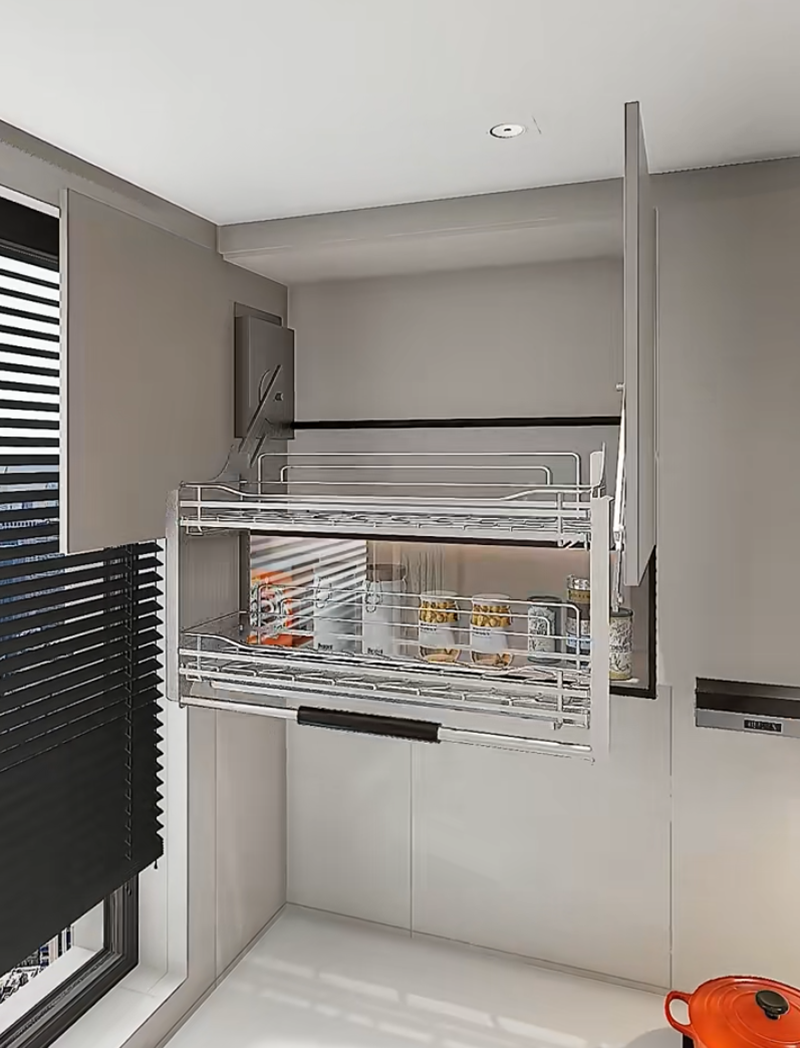
⑦. Drop-Down Basket + Flip-Up Cabinet: "Zero Bending" for Commonly Used Items
⑦. Drop-Down Basket + Flip-Up Cabinet: "Zero Bending" for Commonly Used Items
Shorten the length of the left hanging cabinet, add a drop-down basket (for commonly used snacks and instant noodles) below, and make a flip-up cabinet (for spare tableware) above. The drop-down basket is within reach, and the flip-up cabinet will not hit your head when opened. You can take items without "bending over" throughout the process, making cooking easier.
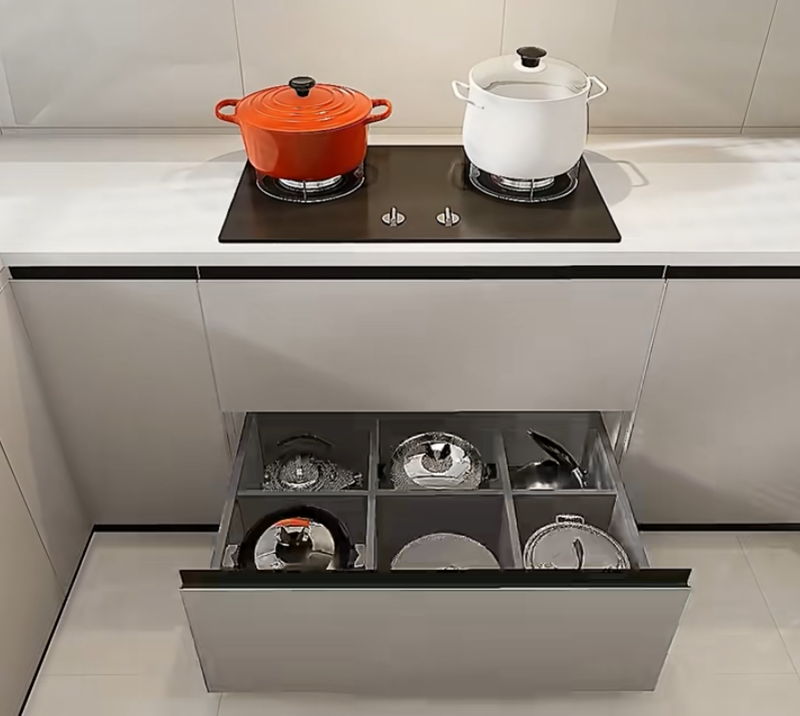
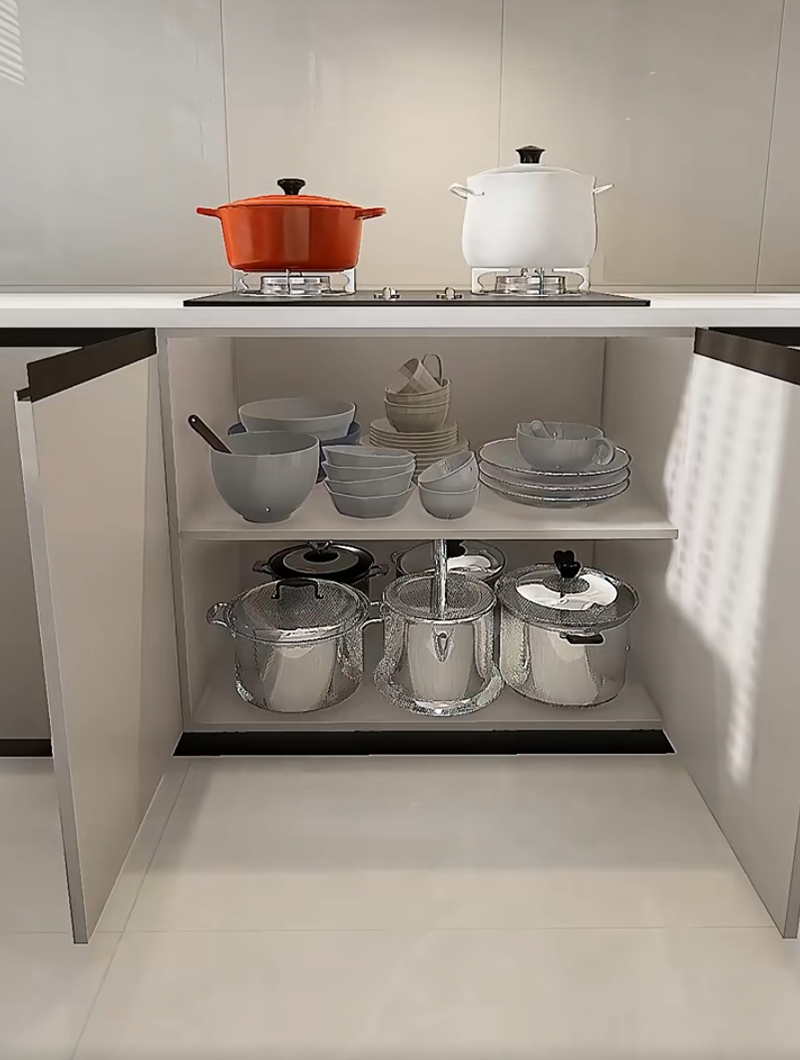
Ⅳ. Base Cabinet Area: From Pots and Pans to Vegetables, Everything "Finds Its Place"
⑧. Large Drawer Base Cabinet: Tableware Storage "At a Glance"
Ⅳ. Base Cabinet Area: From Pots and Pans to Vegetables, Everything "Finds Its Place"
⑧. Large Drawer Base Cabinet: Tableware Storage "At a Glance"
Do not make laminates for the base cabinet, and replace them all with large drawers. Use partition boxes on the upper level to hold chopsticks and knives and forks, and place bowls, plates, and pots on the lower level. The interior of the drawer is customized according to the size of the items. When the door is closed, it completely isolates oil stains, which is 10 times cleaner than open shelves, and there is no need to "fish for needles" when looking for things.
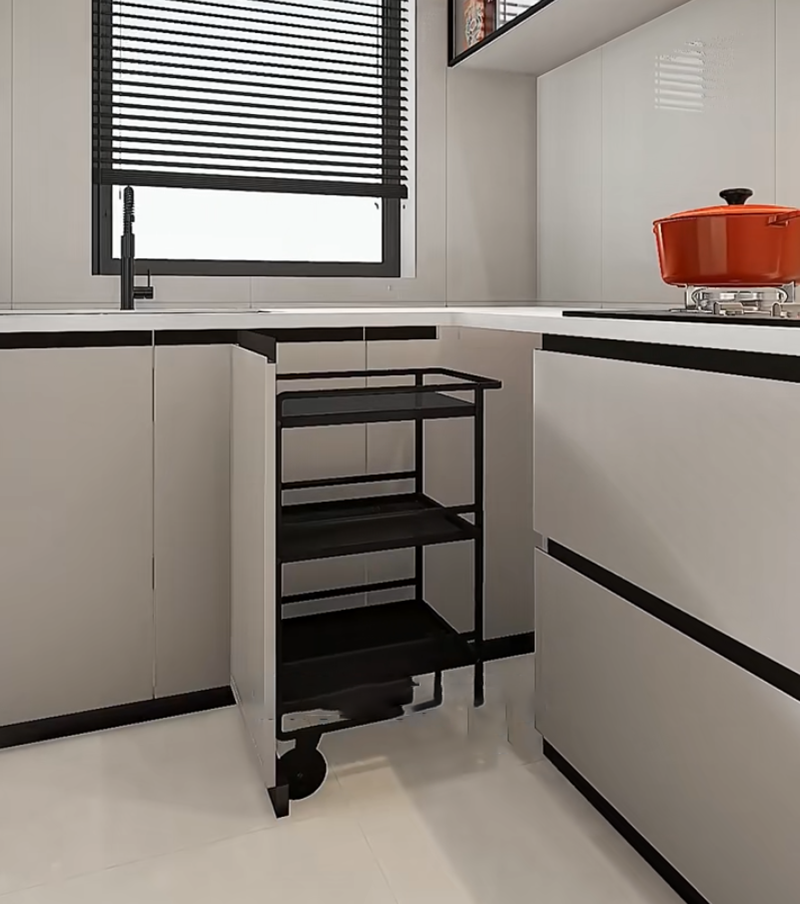
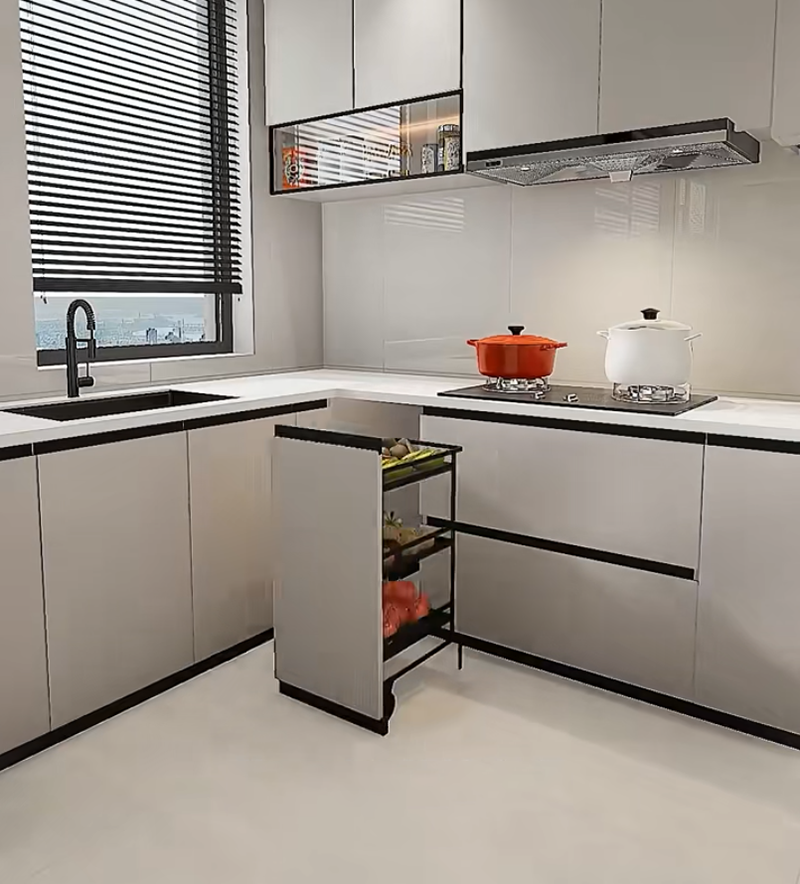
⑨. Corner Trolley: "Breathable Storage" for Vegetables
⑨. Corner Trolley: "Breathable Storage" for Vegetables
Leave space in the corner of the base cabinet and place a movable trolley. Store vegetables such as potatoes and carrots in layers. The mesh basket design allows ventilation and prevents vegetables from getting stuffy. The trolley has universal wheels and can be pulled directly to the sink when washing vegetables, which is much neater than piling them on the countertop.
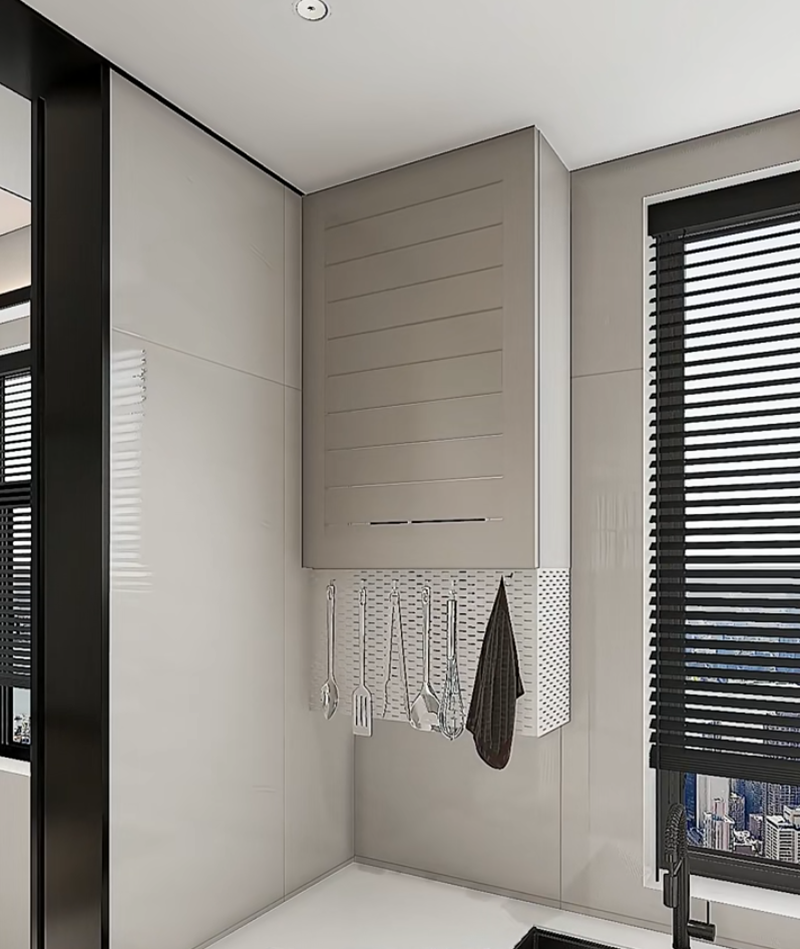
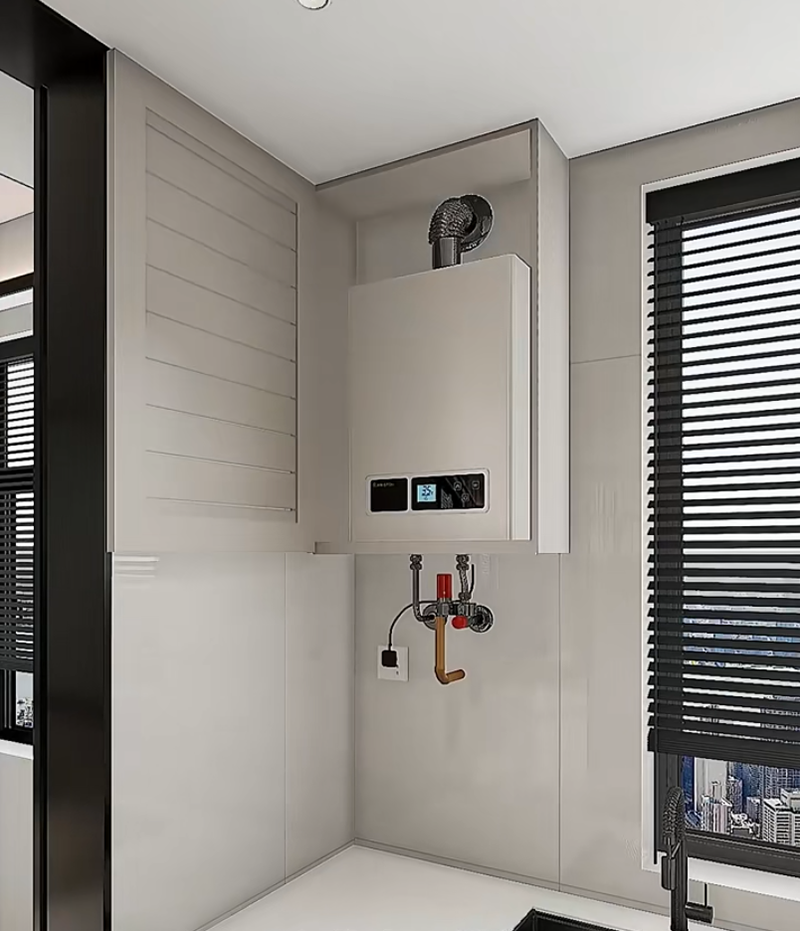
Ⅴ. Utilities Area: Turn "Cluttered Pipes" into Storage Highlights
⑩. Thin Cabinet for Water Heater + Pegboard: Beautiful and Practical
Ⅴ. Utilities Area: Turn "Cluttered Pipes" into Storage Highlights
⑩. Thin Cabinet for Water Heater + Pegboard: Beautiful and Practical
Make an ultra-thin cabinet (12cm thick) to enclose the water heater to cover the pipes and make it more beautiful. Install a pegboard below to hang kitchen utensils such as spatulas and spoons, which can be reached with a stretch of your hand when cooking. It is neater than hanging on the wall and can also prevent kitchen utensils from rusting.
Answers to Frequently Asked Questions: Avoid These Common Mistakes
①. “With so many cabinets, will I end up filling them with unnecessary things?”
Cabinet design should be customized to your needs. Place frequently used items (seasonings, tableware) in easily accessible areas, and store infrequently used items (holiday tableware, spare small appliances) in tall or corner cabinets. For small kitchens, reduce the number of tall cabinets and opt for more drawer cabinets to balance storage and space.
②. “Do you have a link for the vegetable cart? How do I choose the right size?”
②. “Do you have a link for the vegetable cart? How do I choose the right size?”
For the vegetable cart, choose one that’s 30 - 40cm wide and 70 - 80cm high, which fits well in the gap beside cabinets. Prioritize metal mesh baskets with caster wheels for good load - bearing capacity and easy cleaning. When shopping online, search for “narrow kitchen vegetable cart” and check real - user reviews for accurate size information to avoid buying the wrong one.
③. “Can the door of a built - in refrigerator open fully?”
③. “Can the door of a built - in refrigerator open fully?”
Select a “zero - clearance” built - in refrigerator, whose door won’t protrude when opened, ensuring full functionality. For regular built - in fridges, the door usually opens at a 90 - degree angle, sufficient for accessing items. When customizing the cabinet, leave enough space for the door to open without hitting adjacent cabinets.
The key to kitchen storage isn’t about having more cabinets, but about having the right ones. Follow this 10 - cabinet layout and adjust it according to your needs to meet storage demands without wasting space. If you have more design questions, feel free to leave a comment and let’s create a clutter - free kitchen together!
The key to kitchen storage isn’t about having more cabinets, but about having the right ones. Follow this 10 - cabinet layout and adjust it according to your needs to meet storage demands without wasting space. If you have more design questions, feel free to leave a comment and let’s create a clutter - free kitchen together!